 House of Rionysus
DGen Studio docs
The studio
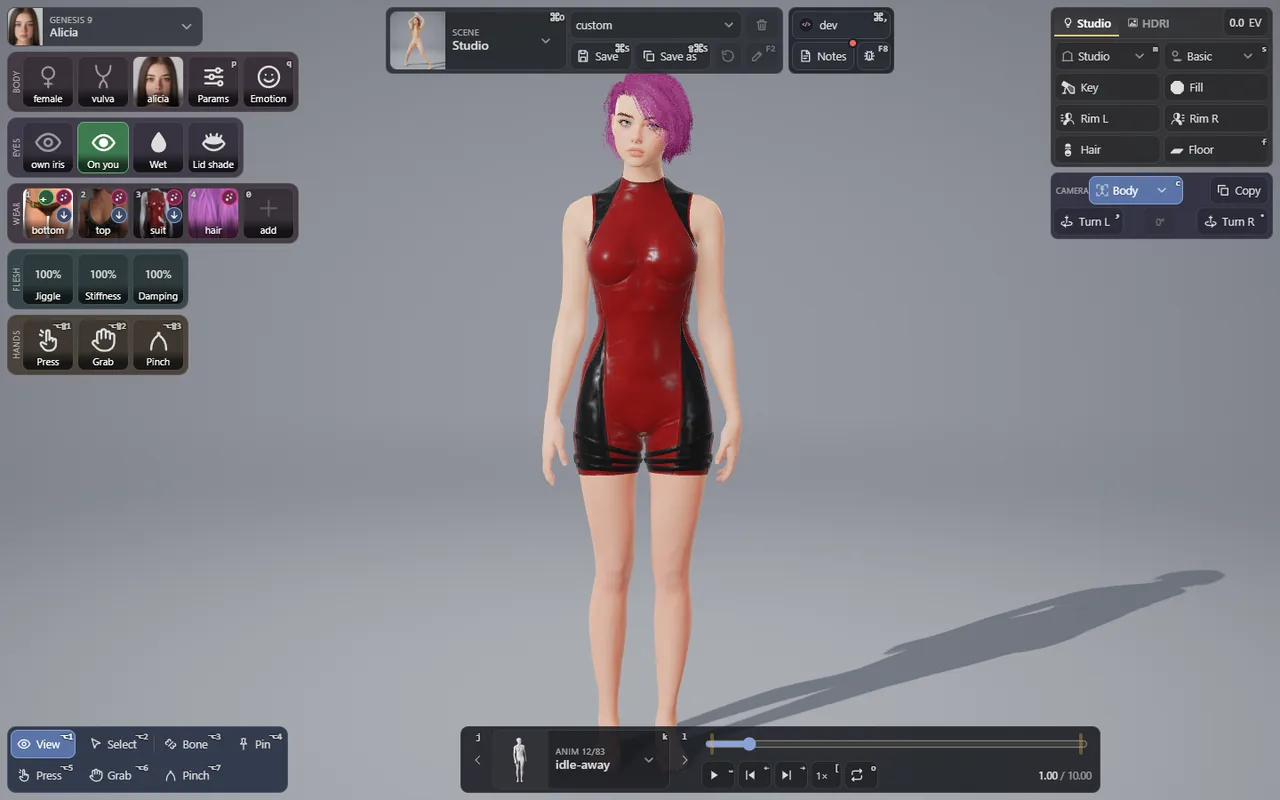
The body stands in the middle. The controls sit along the edges, so they never cover it:
| Where | What |
|---|---|
| Top left | The inspector: the selected body and its rows (body, eyes, wear, flesh, hands). See The body. |
| Top middle | The scene bar: the scene, its presets, Save and Save as. Right of it: your profile, Notes and the report button. |
| Top right | The room and its light, and the camera under it. |
| Bottom left | The tools: what a drag on the stage does. See Tools. |
| Bottom middle | The player: the clip and its timeline. |
| Bottom right | The look, physics and performance, and the frames per second. |
Every button shows an icon and a word. A small badge in a button's corner is its key; press ? for every key (see Keyboard shortcuts). Rest the pointer on a button to read what it does.
Press F3 to hide every control and keep only the view; press it again to bring them back. On a Mac keyboard, hold fn with F3. On a touch screen, tap the small hint in the corner.
The scene bar

- SCENE, with its picture: the scene that is open. Click it (or press Ctrl O) for every scene, in sections: bodies, walls and demos. Rest the pointer on one to read what it is. See Scenes and presets.
- The preset list (it shows
customwhen no preset is picked): your saved setups of this scene. A*after its name means you changed something since it was saved. - Save (Ctrl S), Save as (Ctrl Shift S), Discard (the round arrow), Rename (the pencil, F2) and Delete (the trash). See Scenes and presets.
- Your profile: opens the config (Ctrl ,). See First run and the config.
- Notes: what is new in each version, and the update when one is out. A dot means there is something you have not read. See Updates.
- The bug button (F8): report an issue. See Reports.
When a scene would use a Daz product your library lacks, a line under the scene bar says so: Missing for this scene. Click it for the list, each product with what it adds and a link to get it.
The player and the clips

- ANIM, with its picture: the clip that plays. Click it (or press K) for every clip as a grid of pictures, in sections. Type to filter. The arrows each side, or J and L, go to the previous and next clip.
- The timeline: drag it to scrub. The time and the clip's length are at its right.
- Play or pause (Space), a frame back and a frame forward (← →), the speed (1×, 0.5×, 0.25×, 0.1×; [ slower, ] faster), loop (O).
The clips you get: five free motion capture clips that come with DGen (a kick, side twists, a squat, a stretch and a wave), and your own Mixamo clips (see First run and the config). The first entry of the list is none: the clip stops and the body holds the pose it has, its flesh, its skeleton and the tools still live. Press it, grab it, and it comes back to that pose. Pick any clip to play again.
A clip plays on the body's own Genesis 9 skeleton. The first time a clip plays on a body, DGen prepares it, which takes a moment.
The camera
At the top right, under the room.
- The framing (C): Face, Chest, Hips, Body and Free. Face, Chest and Hips frame the body where it is now, even bent over. Body shows it whole. The list shows Free once you move the camera yourself.
- Move the camera: drag on the stage to turn around the body, the wheel to zoom, a right drag or Shift and drag to pan. On a touch screen, drag to turn, two fingers to zoom and pan. A double click or double tap frames the body.
- Turn L and Turn R (, and .) turn the body 45 degrees under the fixed lights. Between them, its heading; click it to face the front again.
- Copy copies the shot as one line of settings: the camera, the clip and its time, and the scene's settings. Add it after
?to the studio's address to open that exact view. - Enter VR appears last when your browser and headset offer VR. See VR.
The room and its light
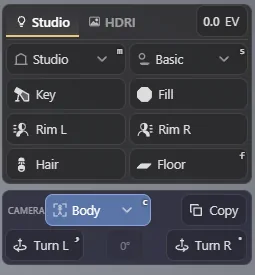
Two tabs, Studio and HDRI, and EV, the exposure (drag it up or down, or click it for its slider; a double click puts 0 back).
Studio: a photographer's rig of lamps around the body, fixed in the room, so you can turn the body or the camera under the same light.
- The room (M): Studio (a grey blue room, a soft box key, the body's shadow on a light floor), Dark (a black backdrop, the outline lit by the rims), Sky (a blue sky over a pale ground, the key as the sun) and Plain (a flat backdrop, no floor, no shadow: the cheapest, for a slow computer).
- The shadow (S): None, Basic (a crisp edge), Soft (sharp near the body, softer farther) and Soft all (the hair too, the costliest).
- The lamps: Key, Fill, Rim L, Rim R and Hair, each on or off. Floor (F): the floor and the shadow on it.
HDRI: a 360 degree photo as the room, its own light on the body.
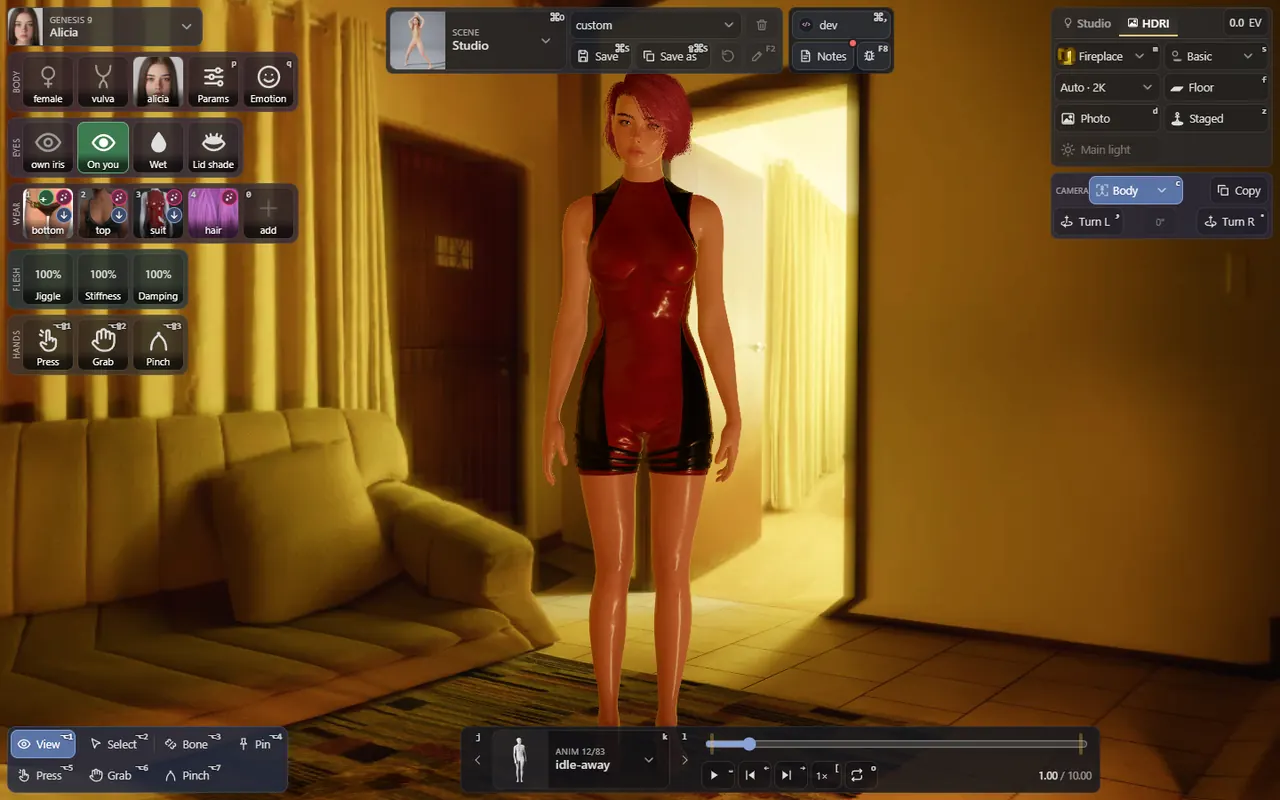
- The room: the two rooms that come with DGen and every HDRI of your HDRI folder (see First run and the config).
- The photo's resolution: Auto, or 2K, 4K, 8K. Sharper costs graphics memory.
- Floor (F), Photo (D: the photo behind the body; off, a dark backdrop and the photo's light alone), Staged (Z: the body stands on the photo's floor and the room around is out of focus; off, the photo is far away, best for high or wide cameras), Main light (the photo's brightest light lights the body as a lamp of its own, with its shadows; off, the whole photo lights it as one soft light).
The look, physics and performance
At the bottom right.
- The look (V): Skin, the body as it is. The other entries are colour views for curious eyes: one shows how far the flesh moved from its rest, out, in and along the skin, the other where the skin touches something.
- Physics: Skeleton (B) makes the skeleton physical: the body resists a push and comes back to its pose. Flesh (H) makes the flesh live. Turn one off to compare.
- Performance, right above the frames per second, two choices DGen remembers:
- Resolution: Auto (the default) draws at full sharpness and lowers the resolution by itself when frames come late, the % under the fps showing where it is. Pick 100 %, 75 %, 50 %, 33 %, 25 % or 10 % to hold it there.
- Max fps: 120, 60 or 30 frames a second at most, the motion at its normal speed. Both keep a laptop cool.
- FPS: frames a second, green at 30 or more, red under 20.
Loading
When a scene loads, a panel under the scene bar lists what DGen is doing: each step, its progress and its time. After that, a change (a hair, a garment, a clip, a room) shows a small spinner on its control and a pill under the scene bar while it loads; the controls stay usable. The first time DGen builds something from your library it takes a few seconds; the next time it comes from the cache.